Wardrobe by Me Ava Belt Construction and Attachment
on
Get link
Facebook
X
Pinterest
Email
Other Apps
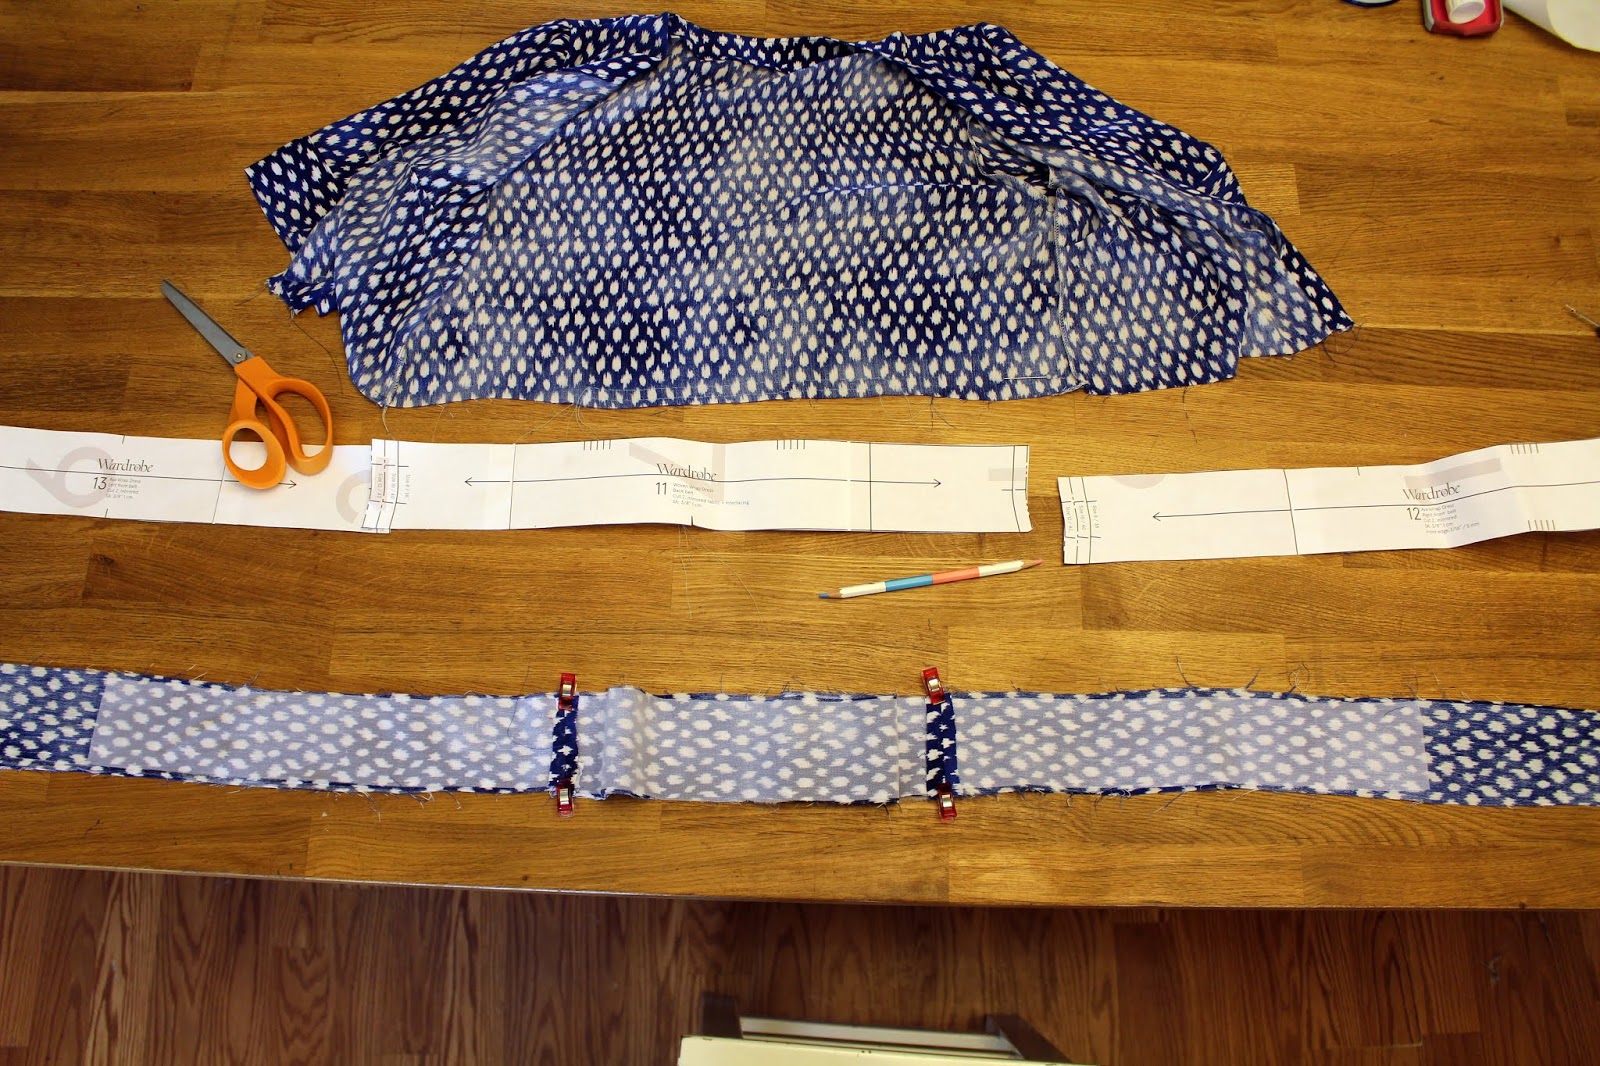
When we were testing the Ava wrap dress (affiliate) there was a request for a video on attaching it. I figured if I was making a tutorial for attaching it I could also show the steps for assembling the belt as well. The videos below show how to attach. The pictures at the top show how to assemble the belt.
First lay out your bodice and the belt pieces. I find it easier to keep track of which side of the belt is the right and left and how to assemble everything if I have the bodice near.
Right side (short belt) Left Side (long belt)
If you follow the directions properly you will have cut 4 interfacing pieces for the belt and have interfaced both layers of the right and left belt unlike my picture above.
Pin and then sew the left belt (long belt is squished to show it is mirror images) side to the back belt piece.
Press the seam open.
Paying close attention that the angled edges are pointed in the same direction, pin and sew the right belt side to the back and left side.
Press the seam open.
Place the outer belt on the inner belt right sides facing.
Sew from one notch around the point of the belt and back up to the other notch. It is important to follow the notches so that you can fit the belt around the bodice.
Gather the waist to match the notches of the belt. This makes the side seams match the seams of the belt. When I gather I always sew two rows of stitches. I insert pins at the edge of the gathering stitches and gently pull both bobbin threads at the same time to gather the fabric to the required length. When the length matches I wrap both bobbin threads at the side in a figure eight around the pin. (you can kind of see the thread twisted around the pins in the picture below) This keeps the gathering from releasing as I spread the gathers out along the length gathered.
Set up the bodice and belt. Make sure the long side is on the wearer's left front and the short side is on the right front. Sandwich the bodice between the layers of the belt that is unsewn to the edge of the interfacing. It is really important to make sure you are matching the short side seams exactly as you follow the steps.
Pin the belt to the bodice. Bottom layer is the belt, middle is the bodice, top is the belt. I like to start with the side seam an then move to the edge of the bodice when I pin. I am carefully matching the seams and moving the bodice between the belt layers so that the bodice isn't stretched (most fabrics that are appropriate for this dress will be shifty and easy to stretch out of shape). Take you time pinning or clipping so that you don't have any wrinkles when you sew them together. If you have pins in the gathering stitches be sure to remove them as you sew (no one likes a sewing machine that is out of timing).
Where you sew to get an enclosed seam inside the belt.
Attaching the skirt to the inner waistband (only one layer not both layers of the waistband). Lay the bodice with attached belt, wrong side up. Place the skirt wrong side facing the wrong side of the bodice. Match side seams and pin to the inner waistband. Match the edge of the skirt with the front of the bodice, so that it will look like a continuous piece when sewn. Match second side seam and the final edge. Sew the skirt to the inner waistband.
Press the unsewn edge of the waistband down 3/8". Pin the waistband to the skirt. Pay attention to match the right side seam (side with the shorter tie) of the belt exactly, because it will be opened to make the belt loop hole. I like to pin at the side seams first then the middle. If necessary you can add extra pins at the halfway points. Pinning like this helps distribute the fabric evenly and prevents large wrinkles at the ends. If you have an edgestitching foot use it to sew the seam.
Very carefully sew the outer waistband down onto the skirt. Make sure the belt/waistband is covering the seam line from when you attached the skirt to the inner waistband. I use an edgestitching foot. Placing the edge guide right along the belt bottom and moving my needle three positions to the left. This keeps my presser foot nice and straight and provides pretty final stitches. Take your time as you sew. The skirt is a lot of fabric to move around. Make sure your presser foot isn't creating wrinkles in the skirt as it pushes the fabric forwards (my Bernina presser foot pressure is a bit high here and at one point I had to stop and lift it to remove a wrinkle I cropped it out, because it was annoying to watch my hand be in the way).
Last step. Seam rip the belt opening on the right front side (shorter belt tie side) and sew around the opening. I used a triple stitch here. I tried a buttonhole stich with my first dress and it was a big mess. When sewing the sides together focus on keeping any stray threads tucked inside, so you have less to trim later.
If you made it here you have a finished dress. Happy Sewing!
Looks like there are 6 interfacing pieces, according to the diagram that accompanies "Prepare the pattern pieces." Both back belt pieces and the pointed ends of all 4 tie pieces (2 each for left and right) appear to be interfaced. The instructions on the pattern pieces are ambiguous.


Looks like there are 6 interfacing pieces, according to the diagram that accompanies "Prepare the pattern pieces." Both back belt pieces and the pointed ends of all 4 tie pieces (2 each for left and right) appear to be interfaced. The instructions on the pattern pieces are ambiguous.
ReplyDelete