


- Round or Square Collar
- Gathers on the front and back of the neckline
- Front Buttons
- Optional Pocket
- Curved Hem
- Dropped Shoulder
- Long Sleeve with gathers and slit
- Short Sleeve with a cuff
PDF Features
- Size 0-24 US (30-54 Euro)
- 3/8" seam allowance
- Layers (to print just the needed sizes I highly recommend using them for the collar and cuff pieces)
- No trim pages
- A0 Large Format Print File
- Garment and Body Measurement charts (both Imperial and Metric)
- interfacing on the collar and cuffs (optional if you want on the button placket)
- Notches for sewing the collar, cuff, and sleeves (asymmetrical sleeve)
Quick pattern review before talking about my actual blouses. First, like all of the other WBM patterns I have ever sewn it is beautifully graded and all of the pieces are trued. It sews up exactly to match the garment measurement chart. The pattern pieces have notches for setting in the sleeve (which fit easily first try), placing the collar, and adding the cuffs.
The long sleeve version is not a quick sew. Gathering the neckline and matching the collar takes time to do it correctly. Then you basically repeat the process for both sleeves. I really liked the method she uses to add the collar and cuffs. You sew the outer layer of the collar/cuff first and then add the inner collar/cuff. This helps you match the edge of the collar/cuff perfectly with the pieces it is sewn to. I love how professional both blouses I sewed look. I know that no one walking past me on the street would guess I sewed them. Part of the professional finish is the quality of the machine you use to sew. I really love and trust my Bernina and it's automatic buttonhole foot made sewing 14 buttonholes in a few minutes super simple. You set the diameter of the button and the hole is sewn for you with the press of a button. I normally stick with buttons that have visible holes so that I can sew them on with my automatic button foot, but this time I found buttons with a shank instead, so I had to take the time to hand sew them.

I made two, the first was my muslin with fabric from my stash where I used a stretch chiffon from the silky print section of Joann's Fabric. I always muslin new patterns with fabric I can stand to lose. The light pink fabric is nice, but I wasn't quite as much in love with as my Cotton & Steel Rifle Paper Company Wonderland Print in Rayon. Note the pattern specifically says not intended for stretch fabrics. I knew it would be okay, because it only stretches when you pull on it and I was going to be interfacing the collar and cuffs. This was a difficult fabric to sew, because it really didn't hold a press and when I got the iron warm enough to set a seam the fabric would start to curl. I do like my blouse but wouldn't sew another one with that line of fabric.

Important things to note when you sew this blouse. There is an arm length in the sewing chart. Use this to lengthen or shorten your sleeves. You can see my sleeves are too long and puddle around the cuffs. My arm is only 21.5" shoulder to wrist, so I should have removed almost 3" of length. I saw this note about measuring after I had already cut out my sleeves. Trust the measurement chart is was correct.

I am pear shaped and blended from size 8 to size 14 in the pink blouse. The picture above shows how I cut the pattern to fit. It isn't a difficult adjustment for me anymore, but I remember when I started sewing I didn't know where to start. Be sure to check both the body and garment measurements charts when you decide how to bend sizes. This blouse has a lot of ease in the waist, so if you aren't quite as hourglass as she drafts for double check that your waist actually needs you to make any changes. The most important measurement for choosing your size to sew for this blouse is your chest. I have a more extended post on picking sizes for this blouse and blending them here.
Also I'm only 5'2" and this pattern is drafted for 5'8" I had to remove 3" from the bottom hem. Before I did this my shirt was way too long and frumpy. After taking up the hem (I just removed the length from the bottom since it was too late to use the lengthen/shorten line included in the pattern) I actually like the blouse. So if you make one and don't love it consider whether or not it is just too long. Before shortening the hem (tip/left) and after shortening the hem (bottom/right) pictures just below.
It is crazy what a fit difference removing three inches from the bottom makes. I feel curvy and cute in the shortened blouse and frumpy and like I was wearing PJs in my long top.


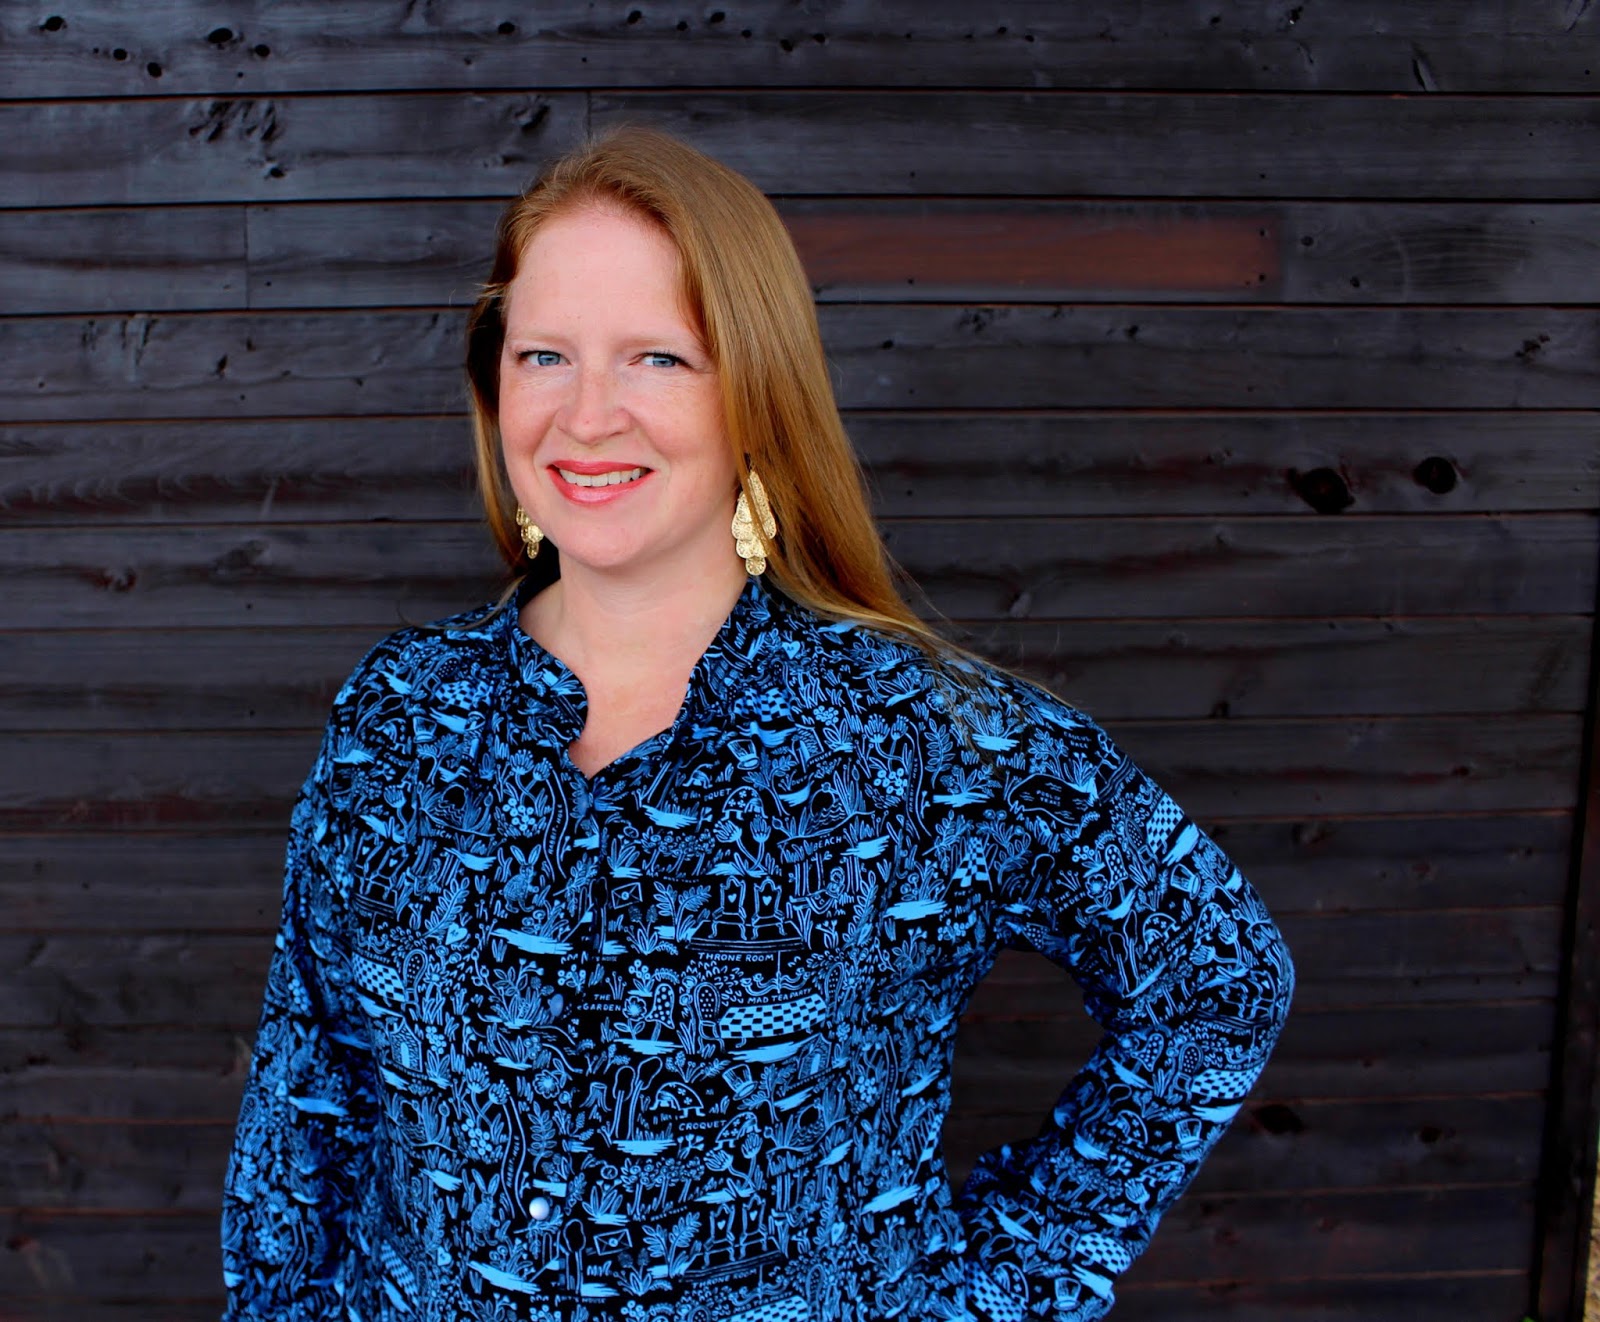
Now onto my second blouse. I used Cotton + Steel Rayon from the Rifle Paper Co Wonderland Collection. I have sewn with quite a few rayon fabrics and I must admit to wondering if this is really rayon. It was a joy to sew. It was easy to lay on my cutting table and cut out my pattern pieces. It wasn't stretching and sliding all over and fighting me. When I pressed the button placket it held beautifully. I highly recommend buying this fabric and can't wait to sew with more Cotton + Steel Rayon.

I think it is so pretty from the back and front and like the way the gathers fall down the back of the blouse.


I've probably gone on long enough, so congrats if you actually read it all. I added a few more pictures to the bottom of the post, because I took 371 pictures and spent hours sorting and editing them, so I might as well share them somewhere.
Happy Sewing!


Thank you for a helpful review, love the fabric you've used.
ReplyDeleteI opened my pattern yesterday and made some adjustments but couldn't figure out how much I should remove on the sleeve length to fit my arm length. The sloped shoulder on the pattern made me confused since I measure my sleeve length from where my shoulder actually is, 🤔. You cleared it out for me, thank you.